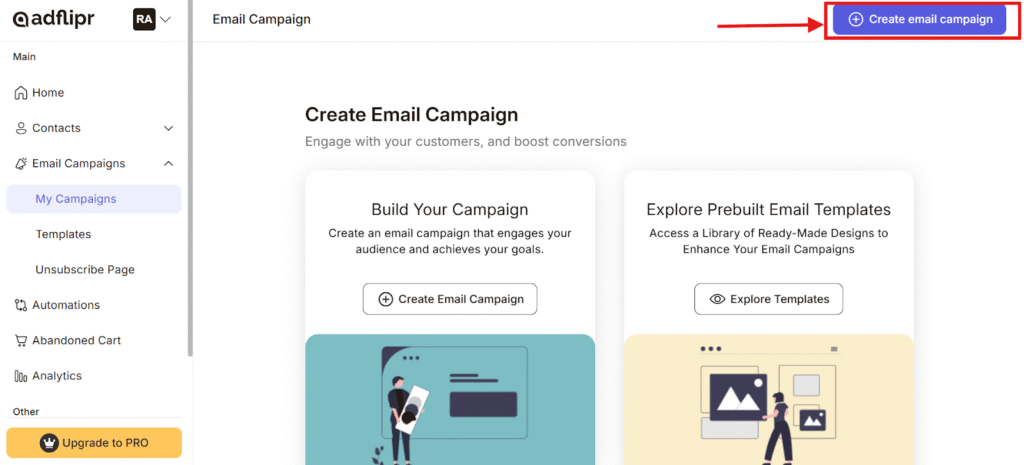
Step-1 – Go to Adflipr Email campaigns section and click on My campaigns tab.
Next click the Create email campaign button.
Step -2 – A page will appear where you have to Fill the relevant campaign name in the welcome email to new users column and click to create a button.

Step-3 Fill the details to create an Email campaign. The filling box of 6 steps will appear step by step with relevant and correct information. Below are the 6 steps that need to be followed to reach the final step.
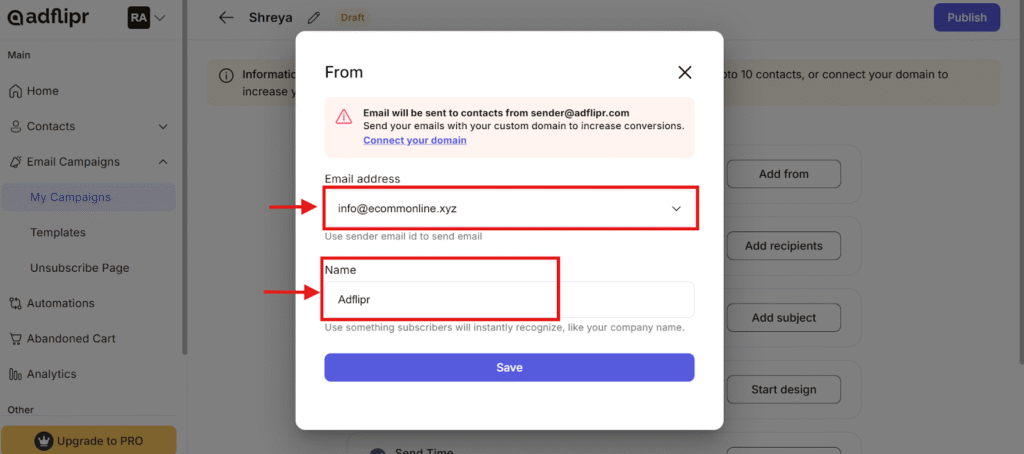
3.1 From– Add the sender name and email address you’ll use to send campaigns to your contacts. Fill the Email address correctly to avoid any mistake.
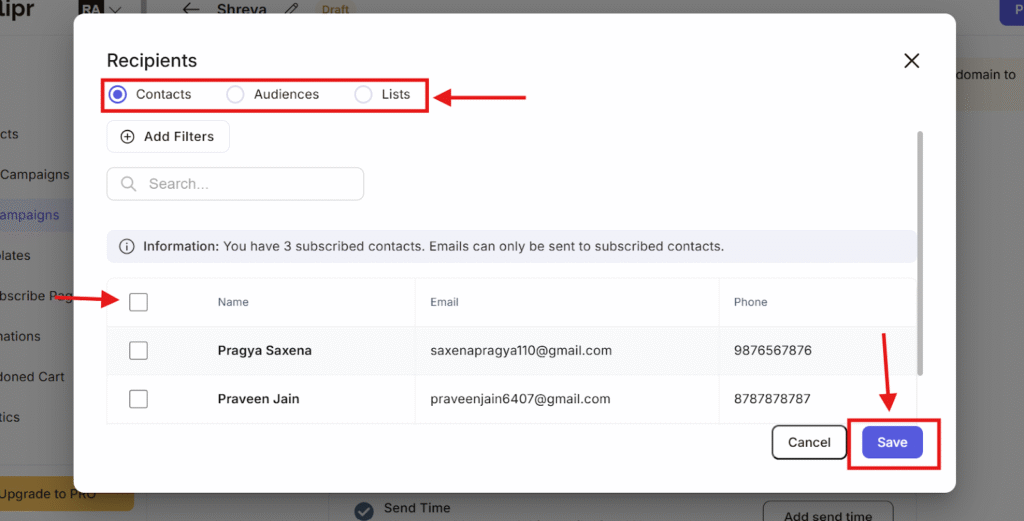
3.2 Recipients-
Pick the contacts / audience / List you want to send your email campaigns. Select names to whom you want to send Email and click the save button.
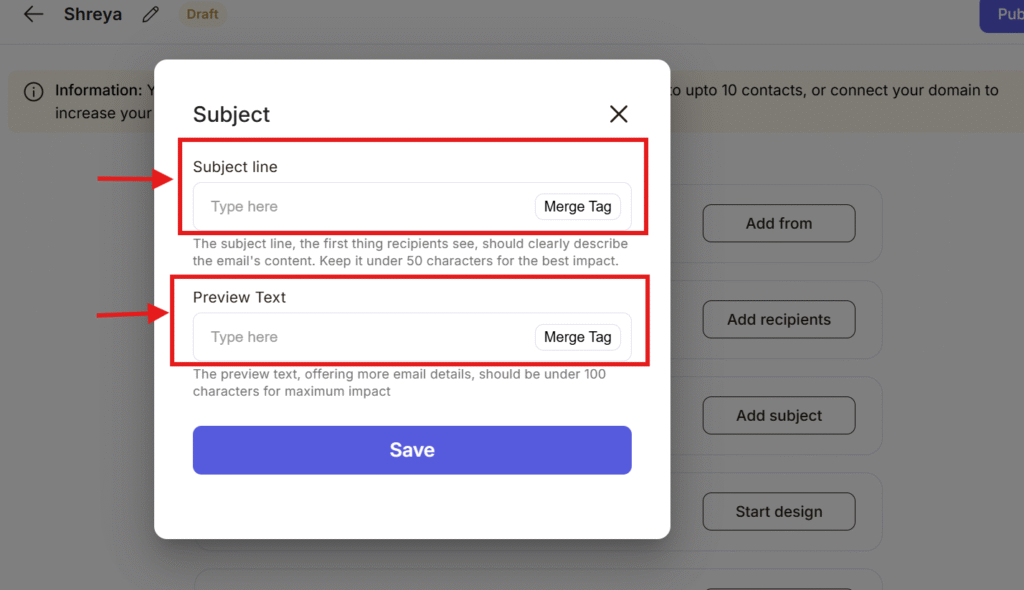
3.3 Subject –
Create a subject line and preview text that grabs attention. It should be short and eye catchy. click the save button.
3.4 Design – choose the template if you want to start it with a blank template go to adflipr templates and click on start from black template.
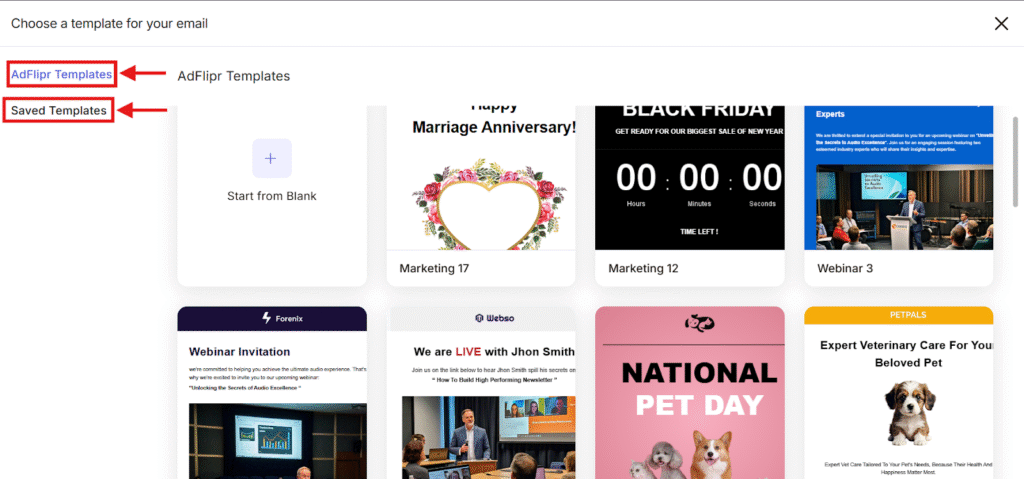
- Adflipr provides designed and customized templates also in adflipr templates sections. As per requirement you can choose relevant templates.
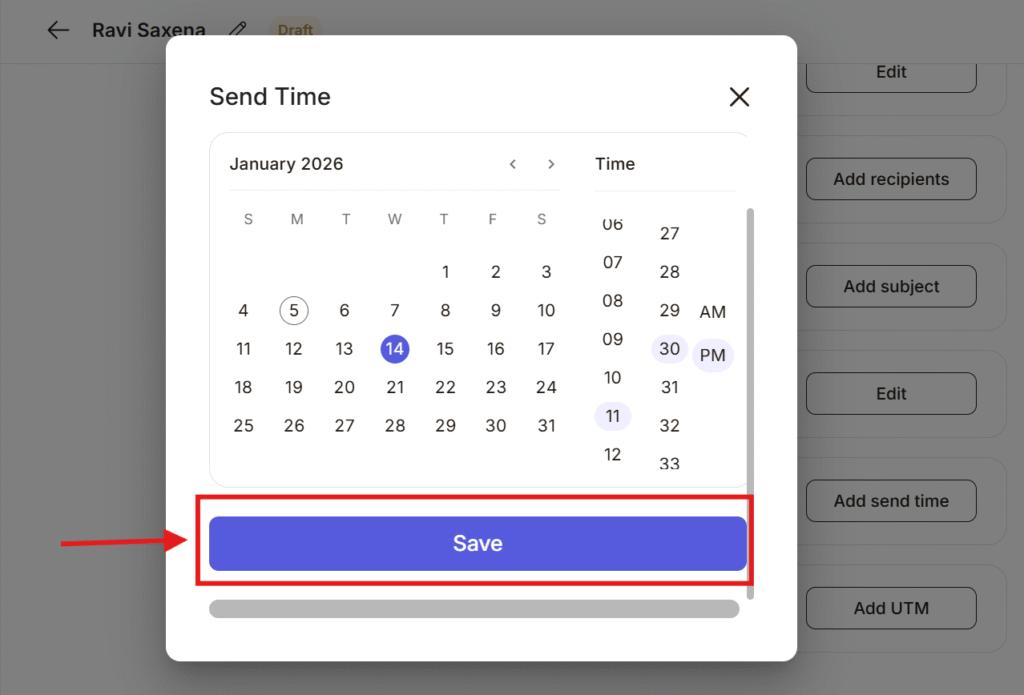
3.5 Send time – send Time means when your campaign will be sent to your audience. You can either send it right now or choose a specific date and time to send it late
Send Now- This option sends your campaign immediately. As soon as you click Save, the campaign starts sending.
You can use this option :
– Your campaign is urgent
– Everything is already reviewed and ready
– You want people to receive it right away
Example:
You want to announce a fresh sale starting now. For this you have to choose Send Now option.

Schedule a Time – This option lets you send the campaign later. You choose: Date and time as per your requirement. The campaign will be sent automatically at that selected time.
Click to save button
You can use this option :
– You want to send messages at a specific hour
– Your audience is more active at certain times
– You want to plan campaigns in advance
Example:
You want your email to go out tomorrow at 11:30 PM. For this you have to choose the Schedule time option and click the save button.
- After selecting Send Now or Schedule a time, click Save.
- Save confirms your choice.
- If you selected:
- Send Now → campaign sends instantly.
- Schedule a time → campaign waits and sends at the chosen time.
- Send Now → campaign sends instantly.
3.6 UTM parameters – its optional, add small tags, add URL to track where your traffic comes from in analytics tools. Fill the campaign source, campaign medium, campaign name , campaign term and campaign content correctly after filling all the details click to save button.
Step-4 After filling all the details click on the publish button.
By performing and following these easy steps and after clicking on publish you can create and send email campaigns with this Your email campaign is now complete.
Now you can see key insights, engagement , performance and your campaign activity in the overview option.